Calendar Overview
When working with customers, resource planning and scheduling can be a complex task. Appointments enable you to meet your customers where and whenever needed.
OTRS supports this requirement with calendars. Calendars allow management of appointments and resources inside the ticket system. You can connect your tickets to scheduled tasks and make them available to all users to see. This feature adds transparency to show your teams workload and prevent users from promising resources which are not available.
Use this screen to get an overview of the added calendars. The overview screen is available in the Calendar Overview menu item from the main menu.
Calendar Widgets
Note
There are no calendars added by default. Please contact your administrator to add one or more calendars.

No Calendars Found
This overview works the same like usual calendars. Different time periods and timelines can be selected to view appointments, and it is possible to jump between different periods.
The default installation comes with three separate widgets for the daily, weekly and monthly calendar view. Basically all widgets are the same, but with different widget configuration. All widgets support agenda view, timeline view and grid view.
- Appointments Today Widget
This widget displays the appointments for a specific day.
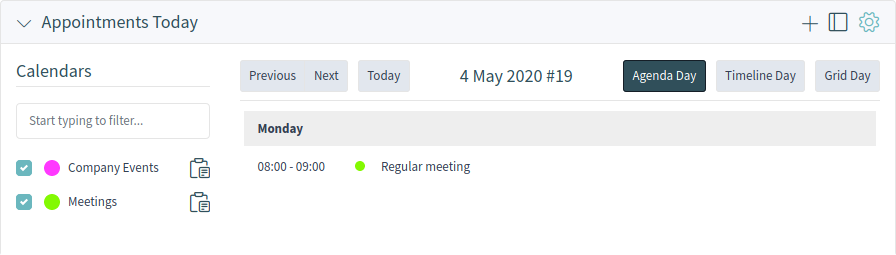
Appointments Today Widget
- Appointments This Week Widget
This widget displays the appointments for a specific week.
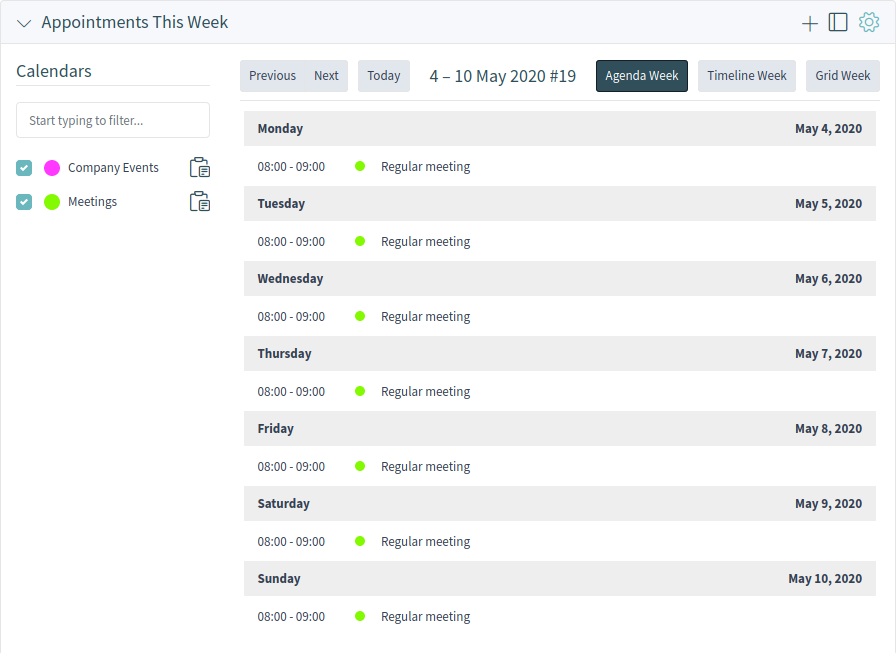
Appointments This Week Widget
- Appointments This Month Widget
This widget displays the appointments for a specific month.
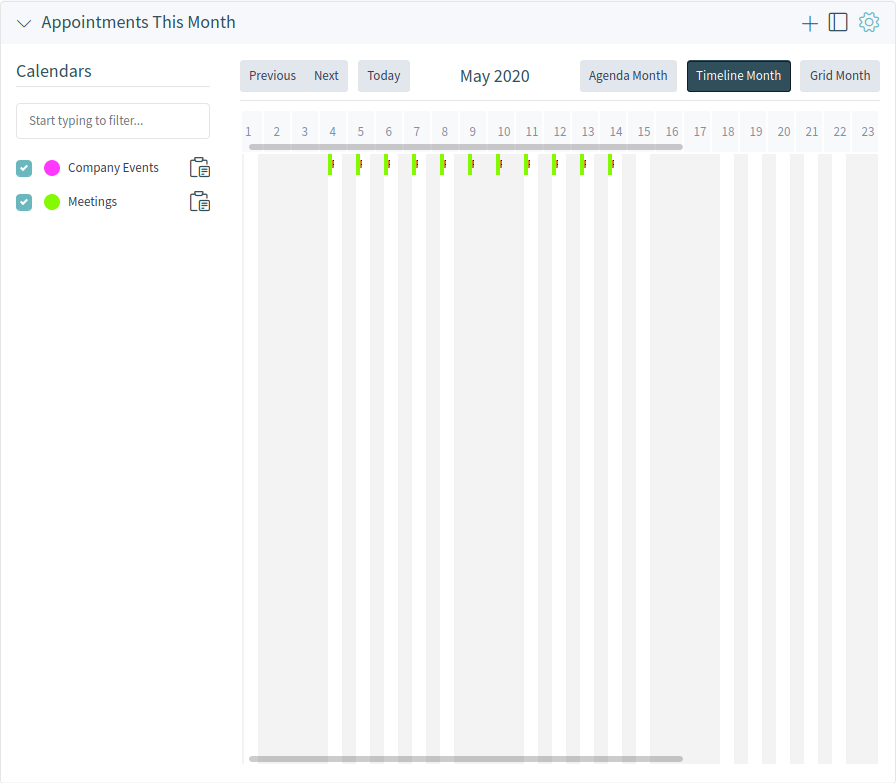
Appointments This Month Widget
Check or uncheck the checkboxes in the Calendars sidebar to show or hide appointments in a specific calendar.
To view appointments in external calendar applications:
- Click on the Copy public calendar URL icon in the Calendars sidebar to copy the URL to clipboard.
- Open your external calendar application.
- Insert the URL into your external calendar application.
Note
If several calendars are added to the system, use the filter box to find a particular calendar by just typing the name to filter.
Within the calendar overview, an agent is able to display, create, edit and/or delete appointments of different calendars, depending on their permission level to the related calendars. Such appointments can be created or edited via drag and drop within this screen.
To add a new appointment:
- Click on the Add Appointment button in the header of the widget.
- Fill in the required fields.
- Click on the Add button.
To edit an appointment:
- Click on an appointment in the calendar overview.
- Modify the fields.
- Click on the Update button.
To copy an appointment:
- Click on an appointment in the calendar overview.
- Scroll down to the bottom of the edit dialog.
- Click on the Copy button.
To delete an appointment:
- Click on an appointment in the calendar overview.
- Scroll down to the bottom of the edit dialog.
- Click on the Delete button.
- Click on the Yes button in the confirmation dialog.
The display options can be changed in the widget configuration.
Add Appointment
Use this dialog to add new appointments to calendars. New appointments can be added by clicking on the plus button in the header of any calendar widget. It is possible to add new appointment from the action menu. It is also possible to drag over a range of the calendar area to setup a rough time span. Right after that, the same dialog appears where the data can be inserted.
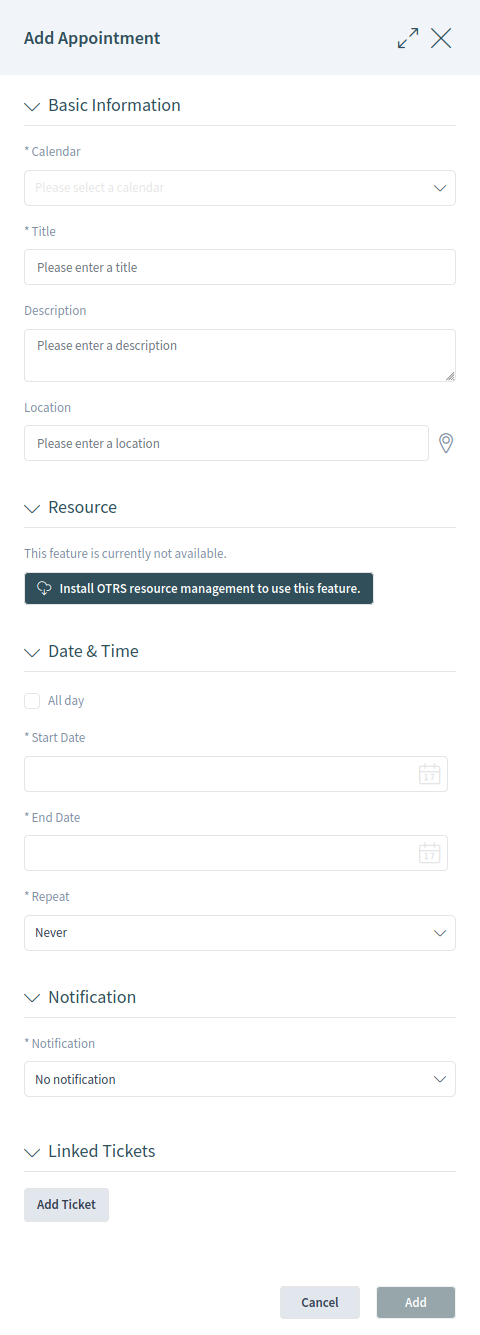
Add Appointment Dialog
Appointment Settings
The following settings are available when adding or editing this resource. The fields marked with an asterisk are mandatory.
- Calendar *
- Select the calendar to whom the appointment will be added to.
- Title *
- The name of this resource. Any type of characters can be entered to this field including uppercase letters and spaces. The name will be displayed in the calendar widgets.
- Description
- Add additional information to this resource. It is recommended to always fill this field as a description of the resource with a full sentence for better clarity.
- Location
If this field contains a value, a related link icon will show up next to the field which links to the configured map to get a better picture of the location.
See also
This link is configurable through the system configuration option
AppointmentCalendar::Location::Link.- Resource
- Resource planning is not part of the OTRS framework. Please contact us at sales@otrs.com for an upgrade.
- All day
- This checkbox indicates that the appointment takes place on the whole day. If it is checked, time of the start date and the end date will be disabled and set to 00:00.
- Start date *
- The start date of the appointment.
- End date *
- The end date of the appointment.
- Repeat *
- Define appointment recurrences and will be described separately, see Repeating Appointments below.
- Notification *
Define time periods an appointment notification should be sent before the appointment start.
See also
Appointment notifications can be set in admin interface. Please contact your administrator.
- Linked Tickets
- Tickets and other objects can be linked to the appointment with this section. Click on the Add Ticket button to see the ticket search.
Repeating Appointments
If appointments needs to be created in a recurring manner, it is possible to setup detailed information about the occurrences of an appointment.
To create repeating appointments:
- Select Start date and End date (or check All day).
- Select from the pre-defined frequencies of the occurrences in the Repeat field or choose the Custom option.
- Choose either a date to repeat until or an amount of times to repeat.
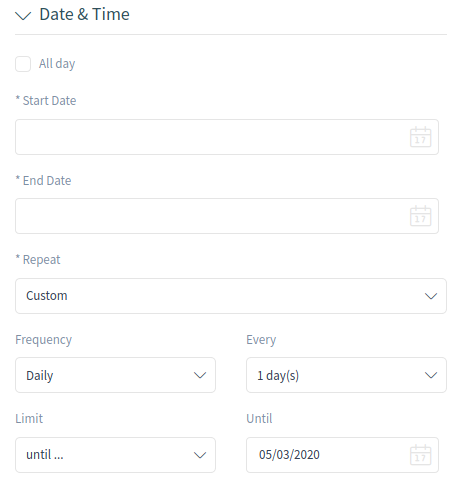
Repeating Appointments
After all decisions are made and the settings are saved successfully, the appointment will be marked as recurring appointment.
Repeating Appointments Overview
The parent appointment will be marked with an endless loop symbol and the child appointments with a chain symbol. This is only displayed in the appointment details when you hover the mouse over an appointment.
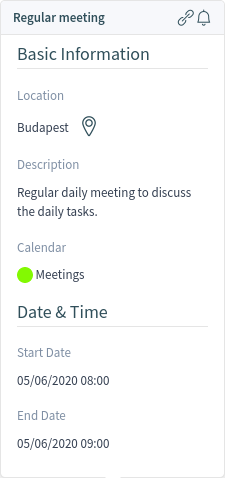
Repeating Appointments Details
Future changes to the parent appointment will affect the children automatically, without any further message. If an agent is about to change one of the child appointments, a message will ask what would they like to update.
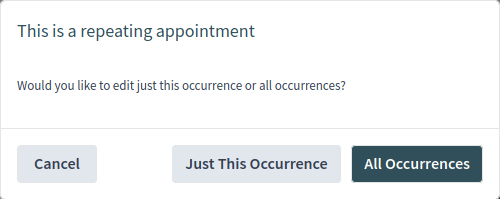
Edit Repeating Appointment
If All Occurrences going to be updated, the behavior will be the same as with the update of the parent appointment. All options (including the recurring settings) are changeable.
If Just This Occurrence will be updated, it is not possible to change the repeating settings, but a related message and a link to the parent appointment will be provided.
The enabled repeating option will be additionally displayed in the tool-tip of the related appointments.